Drip Edge, Why You Can't Skip It on your Next Roof Installation

What Exactly is Drip Edge and Why Does It Matter for Your DFW Roof?
You're investing a significant amount of money into your home, and the roof is arguably the most critical component. When you're looking at new shingles, perhaps from a reputable manufacturer like GAF or Owens Corning, you're focused on aesthetics and durability. But what about the smaller, often overlooked parts that make the whole system work? That's where drip edge comes in. Think of it as the unsung hero of your roof installation, especially here in the DFW Metroplex where we see everything from scorching sun to torrential downpours and the occasional hail storm. It's a simple strip of metal, usually aluminum or galvanized steel, that's installed along the edges of your roof. Its job might seem minor, but its impact on protecting your home from water damage is anything but. Without it, you're leaving a critical vulnerability wide open, and that's a gamble no DFW homeowner should take.
In simple terms, drip edge is a type of flashing. Flashing is any material used to prevent water from entering your home at vulnerable points, like where your roof meets a wall or around chimneys. Drip edge specifically goes along the eaves (the lower edges of the roof) and the rakes (the sloped edges on the sides). Its primary function is to direct water away from the fascia boards and into the gutters, or simply off the roof and onto the ground, rather than letting it seep behind the shingles and into the underlying structure of your home. This might sound straightforward, but the consequences of skipping it can be severe, leading to costly repairs down the line. For us at Montesco Roofing, with over 13 years serving the DFW community, proper drip edge installation isn't just a recommendation; it's a non-negotiable part of a quality roof system.
The Silent Battle: How DFW Weather Exposes Your Roof Without Drip Edge
Living in North Texas means we experience a wide range of weather conditions, and many of them are tough on our homes. We get intense summer heat that can warp materials, sudden and severe thunderstorms that dump inches of rain in a short period, and the dreaded hail that can batter shingles and underlayment. Each of these elements, in its own way, can exploit a weakness in your roof if it's not properly protected. Without adequate drip edge, your roof is fighting a losing battle against gravity and water's relentless desire to find the path of least resistance.
Consider a heavy rain event. Water runs down your shingles, heading towards your gutters. If there's no drip edge, some of that water will naturally run over the edge of the roof deck and onto the fascia board. Fascia is the vertical board that runs along the edge of your roofline, and it's often made of wood. Wood and constant moisture are a terrible combination. Over time, this moisture can lead to rot, mold, and even structural damage. The fascia will soften, making it difficult to hold gutters securely, and eventually, the rot can spread to the rafter tails and even into the attic space. This is a slow, insidious process that can go unnoticed until significant damage has occurred, leading to very expensive repairs that go far beyond just replacing a few shingles.
Then there's the wind-driven rain we sometimes get during DFW thunderstorms. This isn't just water running straight down; it's water being pushed horizontally and even upwards under shingles. A properly installed drip edge creates a clean break, forcing the water to drip off the edge rather than being blown up and under the roofing material. This is especially critical at the rake edges, where wind can really get under the shingles.
And let's not forget hail. While hail directly impacts the shingles, the resulting water runoff can still find those weak points. If water pools or runs behind the shingles due to a lack of drip edge, it can accelerate the degradation of the underlayment and the decking beneath. The Insurance Information Institute notes that water damage is a common homeowner's insurance claim, and many of these issues can be traced back to inadequate protection at the roof's edges. It's a silent battle, but one that your roof is constantly fighting, and drip edge is a vital soldier in that fight.
Beyond Aesthetics: The 5 Core Functions of Drip Edge in Protecting Your Home
Drip edge is more than just a metal strip; it's a multi-functional component designed to ensure the longevity and integrity of your entire roofing system. While its primary job is water management, its benefits extend to several critical areas of home protection. Understanding these functions can help you appreciate why it's an essential part of any professional roof installation, especially here in the unpredictable North Texas climate.
These five functions work together to create a more resilient and durable roof system. It’s about more than just keeping rain out; it’s about maintaining the health of the entire structure beneath your shingles.
Drip Edge vs. No Drip Edge: A Costly Comparison for DFW Homeowners
When you're getting quotes for a new roof, you might see a line item for drip edge, or it might be bundled into the overall cost. It's easy to see it as an optional add-on, especially if a contractor tries to cut corners to offer a lower price. However, skipping drip edge is a classic example of being "penny wise and pound foolish." The cost of proper drip edge installation is a tiny fraction of the potential repair costs down the road when water damage inevitably takes hold.
Let's break down what you're really comparing when you consider a roof installation with or without this crucial component.
| Feature | Roof Installation WITH Drip Edge | Roof Installation WITHOUT Drip Edge |
|---|---|---|
| Initial Cost | Slightly higher due to material and labor for installation. Typically adds $200 - $600+ to a full roof replacement, depending on the home's size and complexity. | Lower initial bid, potentially saving a few hundred dollars upfront. |
| Fascia & Soffit Protection | Excellent. Drip edge diverts water, preventing rot, mold, and degradation of these vital wooden components. Average fascia replacement cost in DFW can range from $500 to $2,000+ depending on the extent of damage. | Poor. Fascia and soffits are exposed to constant moisture, leading to rot, weakening, and potential replacement needs within 5-10 years, or sooner in severe weather. |
| Underlayment & Decking Longevity | Enhanced. Helps keep underlayment and decking dry, prolonging their lifespan and preventing premature failure. This means fewer costly repairs to the underlying structure. | Compromised. Water can seep behind shingles and underlayment, leading to rot in the decking and potential mold growth. Roof deck replacement can cost $1,000 - $3,000+ on average for a DFW home. |
| Gutter System Stability | Improved. Securely attached gutters are less likely to pull away or sag when fascia is sound. | At risk. Rotting fascia makes it difficult to properly secure gutters, leading to sagging, leaks, and potential detachment. Gutter repair/replacement can add $300 - $1,000+. |
| Pest Infestation Risk | Lower. Seals edges, reducing entry points for insects and rodents. | Higher. Gaps at roof edges can become easy access for pests, leading to further damage and costly extermination services. |
| Long-Term Value & Peace of Mind | Significantly higher. Protects your investment, extends roof life, and prevents costly, hidden damage. Offers peace of mind against DFW's volatile weather. | Lower. The initial savings are quickly erased by the high cost of repairs due to water damage, rot, and structural issues. Increased risk of leaks and premature roof failure. |
| Warranty Implications | Supports manufacturer warranties by ensuring proper installation and system integrity. | May void certain manufacturer warranties if proper installation practices, which include drip edge, are not followed. |
As you can see, the initial savings from skipping drip edge are dwarfed by the potential costs of neglect. For a DFW homeowner, where weather can be extreme and unpredictable, this is not a place to cut corners. A small investment upfront for a professional roof installation with proper drip edge will save you thousands in potential repairs and significantly extend the life of your roof. It’s about building a roof system that’s designed to last, not just meet a minimum standard.
Installation 101: Where and How Drip Edge is Strategically Placed
The effectiveness of drip edge hinges entirely on its proper installation. It's not just about slapping a piece of metal on the edge; it's about understanding how water flows and how the different layers of your roof system interact. At Montesco Roofing, we take pride in our meticulous installation process, and drip edge is a prime example of that attention to detail.
Step 1: Eave Installation (Bottom Edges)
At the eaves—the lowest horizontal edges of your roof where gutters are typically attached—drip edge is installed underneath the roofing felt or synthetic underlayment. This is critical. The metal strip extends slightly beyond the fascia board, creating a clean edge for water to drip off. The underlayment is laid over the drip edge, ensuring that any water that might get under the shingles is channeled directly onto the drip edge and then away from the fascia.
Step 2: Rake Installation (Side Edges)
On the rake edges—the sloped side edges of the roof, often found on gable roofs—the installation method is reversed. Here, the drip edge is installed over the underlayment. This prevents wind-driven rain from being blown up underneath the drip edge and into the underlayment or decking. The shingle courses then overlap the drip edge on the rake, effectively sealing it and directing water downwards.
Step 3: Securing the Drip Edge
Drip edge is typically secured using roofing nails. These nails are strategically placed to hold the metal firmly in place without compromising its water-directing function. It's important that the nails are properly spaced and driven flush with the surface, not over-driven (which can tear the material) or under-driven (which can leave gaps).
Step 4: Overlapping and Sealing
Where sections of drip edge meet, they must be properly overlapped to prevent water from seeping through. The top piece should overlap the bottom piece in the direction of water flow. In some cases, especially in areas prone to extreme weather, sealants might be used at these overlap points to create an even more robust barrier.
The specific profile of the drip edge also matters. For DFW, a common and effective profile is the "K" style, which has a built-in gutter-like channel. However, other styles exist, and the best choice depends on the specific roof design and local building codes. Our team is trained to select and install the appropriate type of drip edge to maximize protection for your home.
The Underlayment Connection: How Drip Edge Works with Other Protective Layers
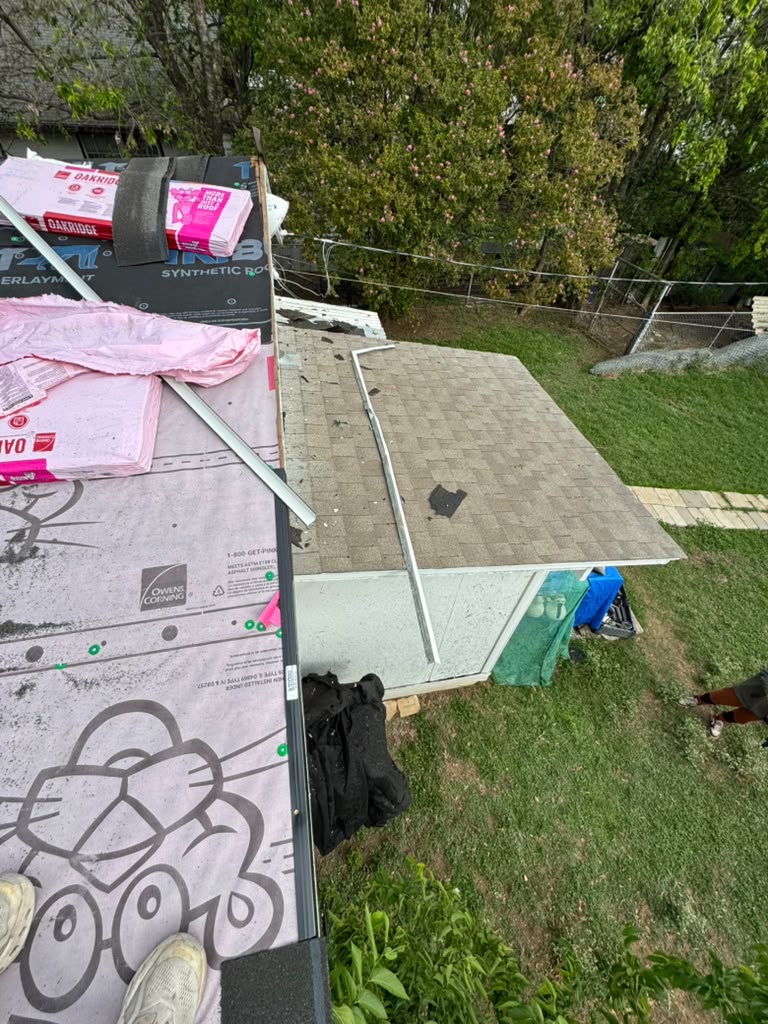
A roof isn't just shingles on wood; it's a sophisticated layering system designed to repel water and protect the structure beneath. Drip edge plays a vital, often underestimated, role in the effectiveness of this system, particularly in how it integrates with the roof underlayment. Think of the underlayment as your roof's second skin, providing a critical barrier if water breaches the shingles. Drip edge ensures this second skin is used to its full potential.
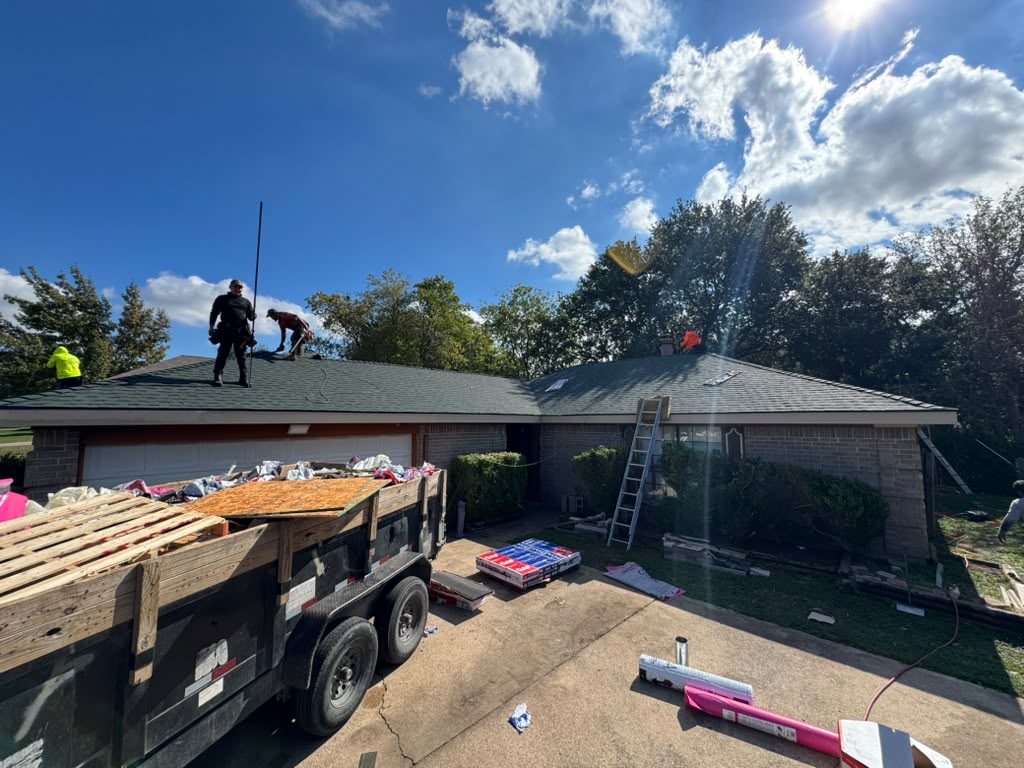
The underlayment, whether it's traditional asphalt-saturated felt or a modern synthetic material, is laid directly over the roof deck (plywood or OSB). Its primary job is to provide a temporary waterproof layer during installation and a secondary barrier against water that might sneak past the shingles due to wind, hail, or age. The way drip edge is installed relative to the underlayment is key to this synergy:
Key Insight
At the eaves, drip edge goes under the underlayment. This means water hits the shingles, runs down to the edge, flows onto the drip edge, and is directed off the roof. If any water were to creep up from the bottom edge of the underlayment, the drip edge is positioned to catch it before it can reach the fascia.
Key Insight
At the rakes, drip edge goes over the underlayment. This is crucial for preventing wind-driven rain from being forced up and under the edge of the underlayment. The shingles then overlap the drip edge, creating a seal that directs water downwards along the rake.
This careful placement ensures that water is managed at the edges, preventing it from pooling or seeping into vulnerable areas. Without this coordinated effort between the drip edge and the underlayment, the underlayment's ability to protect the roof deck and fascia is significantly compromised. The Underwriters Laboratories (UL), a global safety certification company, often references the importance of proper flashing and edge details in their roofing standards, underscoring the need for components like drip edge to work in concert with underlayment for optimal performance.
Furthermore, modern roofing codes, like those adopted by many municipalities in the DFW area, often mandate the use of drip edge specifically because of its role in protecting the underlayment and preventing costly water damage that can lead to structural issues. It’s an integral part of a comprehensive water management strategy for your home.
Common Drip Edge Mistakes That Cost Homeowners Thousands
You'd think something as simple as a strip of metal would be straightforward, but even with drip edge, mistakes happen. These aren't just minor aesthetic flaws; they are oversights that can lead to significant, expensive damage to your home. As a seasoned DFW roofing contractor, I've seen firsthand the consequences of improper drip edge installation. Homeowners in Plano, Frisco, and Fort Worth have learned the hard way that cutting corners here can be incredibly costly.
Mistake 1: Installing Drip Edge Over the Underlayment at Eaves
This is perhaps the most common and damaging mistake. If the drip edge is placed on top of the underlayment at the eaves, water can flow underneath the drip edge and directly onto the fascia and roof deck. This completely negates the purpose of the drip edge and is a fast track to rot and water damage. It’s like putting a raincoat on but leaving the top unzipped.
Mistake 2: Insufficient Overlap or Gaps
When sections of drip edge are joined, they need to overlap correctly to prevent water from seeping through. If the overlap is too small or if there are gaps between sections, water can find its way in. This is especially problematic in DFW during intense rain events where water is driven with force.
Mistake 3: Using the Wrong Type of Drip Edge
Not all drip edges are created equal, and the wrong profile can be ineffective. Some older homes might have had just basic metal flashing, but modern building codes and best practices often call for specific profiles that are designed to integrate better with contemporary underlayments and shingle systems. Using an outdated or incompatible type can lead to performance issues.
Mistake 4: Improper Nailing
Nails that are over-driven can tear the metal or the underlayment, creating entry points for water. Nails that are under-driven leave the drip edge loose, allowing wind to lift it or water to get underneath. The correct nailing pattern and technique are essential for a secure and watertight installation.
Mistake 5: Skipping Drip Edge Entirely
This isn't a mistake in installation technique, but a mistake in the overall roofing plan. Some contractors, particularly those who prioritize speed and cost over quality, might omit drip edge altogether. As we've discussed, this leaves the most vulnerable parts of your roof structure exposed to the elements. The Insurance Information Institute consistently highlights that proactive maintenance and proper installation are key to minimizing claims related to water damage.
These mistakes aren't always obvious to the untrained eye, which is why choosing a reputable and experienced roofing contractor in DFW is so important. We understand the nuances of proper installation and the critical role drip edge plays in protecting your home. The cost of correcting these mistakes later can easily run into the thousands, far exceeding the initial cost of doing it right the first time. For homeowners in areas like Mesquite, Garland, or Arlington, where severe weather can strike quickly, ensuring your roof edges are protected is paramount.
Ensuring Proper Drip Edge Installation with Montesco Roofing
Here at Montesco Roofing, we've been protecting DFW homes for over 13 years. We know that a roof is more than just shingles; it's a complete system, and every component, no matter how small it seems, plays a crucial role. Drip edge is one of those components we never compromise on. Our commitment to quality means we follow manufacturer guidelines and industry best practices to ensure your roof is protected from the ground up.
How to Get This Done
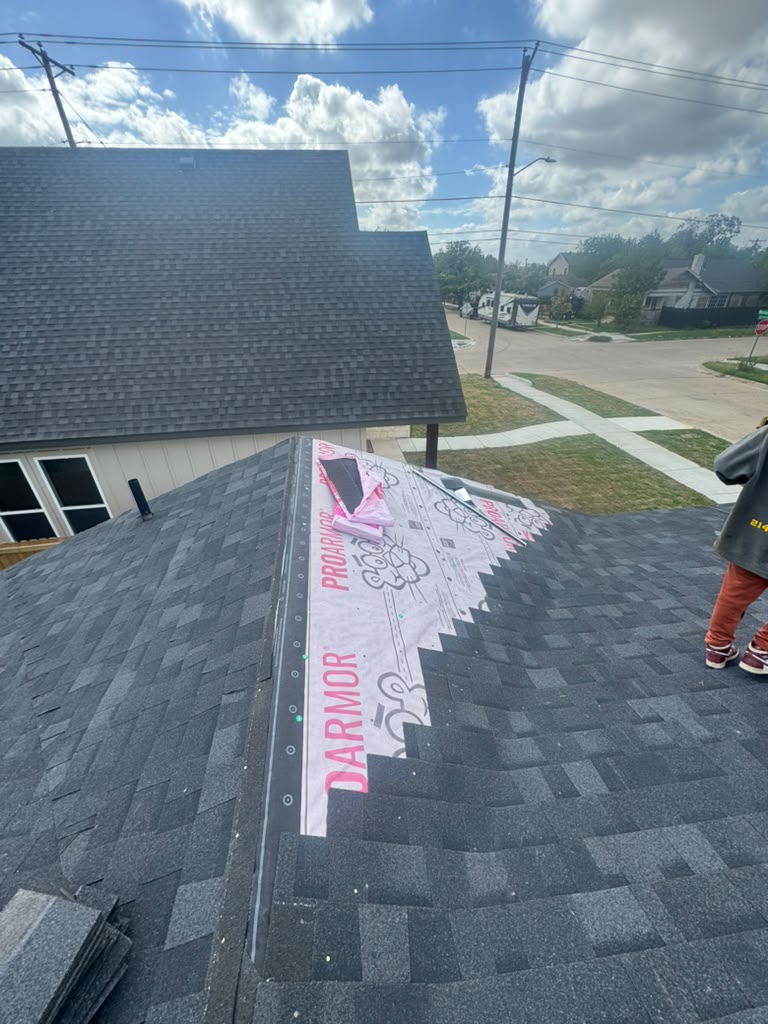
When you choose Montesco Roofing for your roof replacement or repair, you're choosing a team that prioritizes the long-term health of your home. Our installation process includes:
- Meticulous Inspection: We assess your existing roof structure and identify any potential issues that might affect drip edge installation.
- Proper Material Selection: We use high-quality drip edge materials that meet or exceed local building codes and manufacturer specifications.
- Correct Placement: Our crews are expertly trained to install drip edge in the precise locations—under the underlayment at eaves and over it at rakes—to maximize its protective capabilities.
- Secure Fastening: We ensure drip edge is properly and securely fastened to prevent wind uplift and water intrusion.
- Comprehensive Warranty: We stand behind our work with a strong workmanship warranty, giving you confidence in the durability of your new roof system.
If you're in Dallas, Fort Worth, or any surrounding area and need a roof you can trust, let's talk about how Montesco Roofing can protect your home. We're committed to providing transparent pricing and expert craftsmanship.
We understand that navigating roofing decisions can be overwhelming. That's why we believe in educating our clients. We want you to know why certain components are important and how they contribute to the overall performance and longevity of your roof. Drip edge is a perfect example of a detail that makes a significant difference over time. By ensuring it’s installed correctly on every job, we're not just installing a roof; we're building peace of mind for DFW homeowners.
Our experience in the DFW climate, from the intense summer sun to the infrequent but damaging winter storms, has taught us what works and what doesn't. We've seen roofs fail prematurely due to small oversights, and we're dedicated to ensuring that doesn't happen on your home. When you partner with Montesco Roofing, you're partnering with a team that treats your home as if it were their own.
Need help putting this into action? Our team has protected hundreds of DFW homes. Tell us about your roof — free inspection, no pressure.
Get Your Free Roof Inspection →Drip Edge Installation FAQ for DFW Homeowners
Frequently Asked Questions
What is the typical cost of drip edge for a DFW home?
Is drip edge required by code in Dallas-Fort Worth?
Can I just add drip edge to my existing roof without replacing the shingles?
What happens if my drip edge is damaged or missing?
How does drip edge help prevent ice dams in DFW?
What material is drip edge typically made from?
Does drip edge affect the appearance of my roof?
Montesco Roofing Team
DFW's trusted roofing contractor with 13+ years of experience. Specializing in roof replacements, storm damage repair, and insurance claims across Dallas-Fort Worth.
Get in touch →