How to Document Roof Damage Before Calling Insurance
The High Stakes of First Impressions: Why Pre-Claim Documentation is Non-Negotiable
You just survived another DFW storm, the kind that rattles the windows and makes you wonder if the shingles are holding up. Now, you're staring at your roof, or maybe you've spotted a tell-tale water stain on your ceiling, and the dread sets in. This isn't just about a leaky roof; it's about your home, your sanctuary, and a potentially significant financial hit. In our neck of the woods, especially here in the Dallas-Fort Worth Metroplex, we know that storm season can be relentless. We've seen everything from golf ball-sized hail to straight-line winds that can wreak havoc in minutes. When it comes to dealing with your homeowner's insurance after such an event, the first impression you make, and the evidence you present, can make or break your claim. Think of it like this: your insurance adjuster is going to be looking for clear, undeniable proof of damage. If you go into that conversation without solid documentation, you're starting from a disadvantage. This isn't about being tricky; it's about being prepared. As a roofing contractor with over 13 years of experience right here in DFW, I've seen firsthand what separates a smooth, successful insurance claim from a frustrating, drawn-out battle. It all comes down to what you do before you even pick up the phone to call your insurance company. In 2026, with insurance policies and claim processes constantly evolving, being proactive with your documentation is more critical than ever.
Step 1: Immediate Safety First – Assessing Your Roof's Condition Post-Storm
The moment the storm clears and it's safe to go outside, your first priority isn't grabbing your camera. It's your personal safety and ensuring your home's immediate structural integrity. Don't be tempted to climb onto a wet, potentially unstable roof, especially if there were high winds involved. That's a job for professionals. What you can and should do is observe from the ground. Walk around your entire house, looking up. Are there any obvious signs of damage from your vantage point? Think missing shingles, shingles that look lifted or curled, or even large debris that might have fallen on the roof. Note any areas where shingles appear to be missing entirely. Also, take a moment to look at your gutters and downspouts. Sometimes, hail can dislodge them or cause them to bend or detach. If you have any large trees or branches that might have fallen, assess if they've impacted the roof or other parts of your home. It's also a good idea to check your yard for scattered roofing granules. These tiny, sand-like particles are the protective coating on your shingles. When they're found in significant quantities in your gutters or on the ground, it's a strong indicator that your shingles have been damaged and are losing their protective layer. This is a crucial early sign that your roof's lifespan is being compromised.
Even if you don't see obvious damage from the ground, the interior of your home can tell a story. After a significant storm, check your ceilings and walls for any new water stains or drips. Don't dismiss small spots; they can be early indicators of leaks that may worsen over time.
Never attempt to walk on a roof immediately after a storm, especially if there's standing water, strong winds, or if you suspect structural damage. Safety is paramount. Leave roof inspections to trained professionals.
Step 2: The Visual Evidence Kit – What Photos & Videos to Capture (And How)
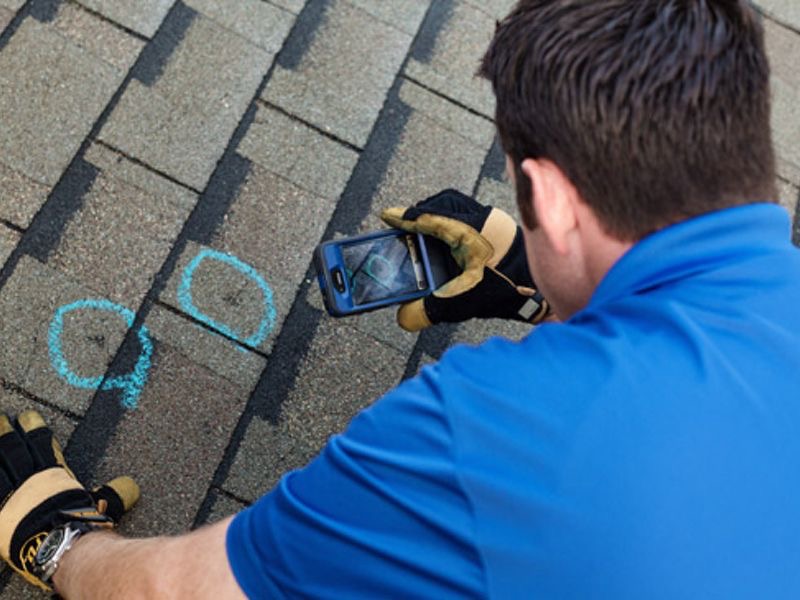
Now that you've assessed the immediate safety situation and noted any surface-level observations, it's time to start building your visual evidence. This is where your smartphone becomes an invaluable tool. The key here is thoroughness and clarity. You want to capture everything, from a wide overview to close-up details. Start by taking wide-angle photos or videos of your entire roof from different vantage points around your property. This establishes the overall context. Then, zoom in. If you can safely do so from the ground with a zoom lens on your camera or phone, capture close-ups of any damaged shingles. Look for dents, cracks, or areas where the shingle material seems compromised. Pay attention to edges, corners, and areas around vents or chimneys, as these are often vulnerable spots. If you have a drone, this is the perfect time to use it for a comprehensive aerial view. This can often reveal damage that's difficult to see from the ground. When you're taking photos, try to include an object for scale, like a coin or a ruler, next to the damage. This helps the adjuster understand the size of the impact. For videos, narrate what you're seeing. Point out specific areas of concern and describe the type of damage you're observing. Remember, the goal is to provide your insurance adjuster with as much clear, detailed information as possible so they can understand the scope of the problem without having to be there themselves initially.
Capture Overview Shots
Take multiple photos and a video of your entire roof from different angles of your property. This shows the overall condition and context.
Zoom In on Damage
Get close-up shots of individual shingles, especially areas with dents, cracks, or missing granules. Use a scale object (coin, ruler) for size reference.
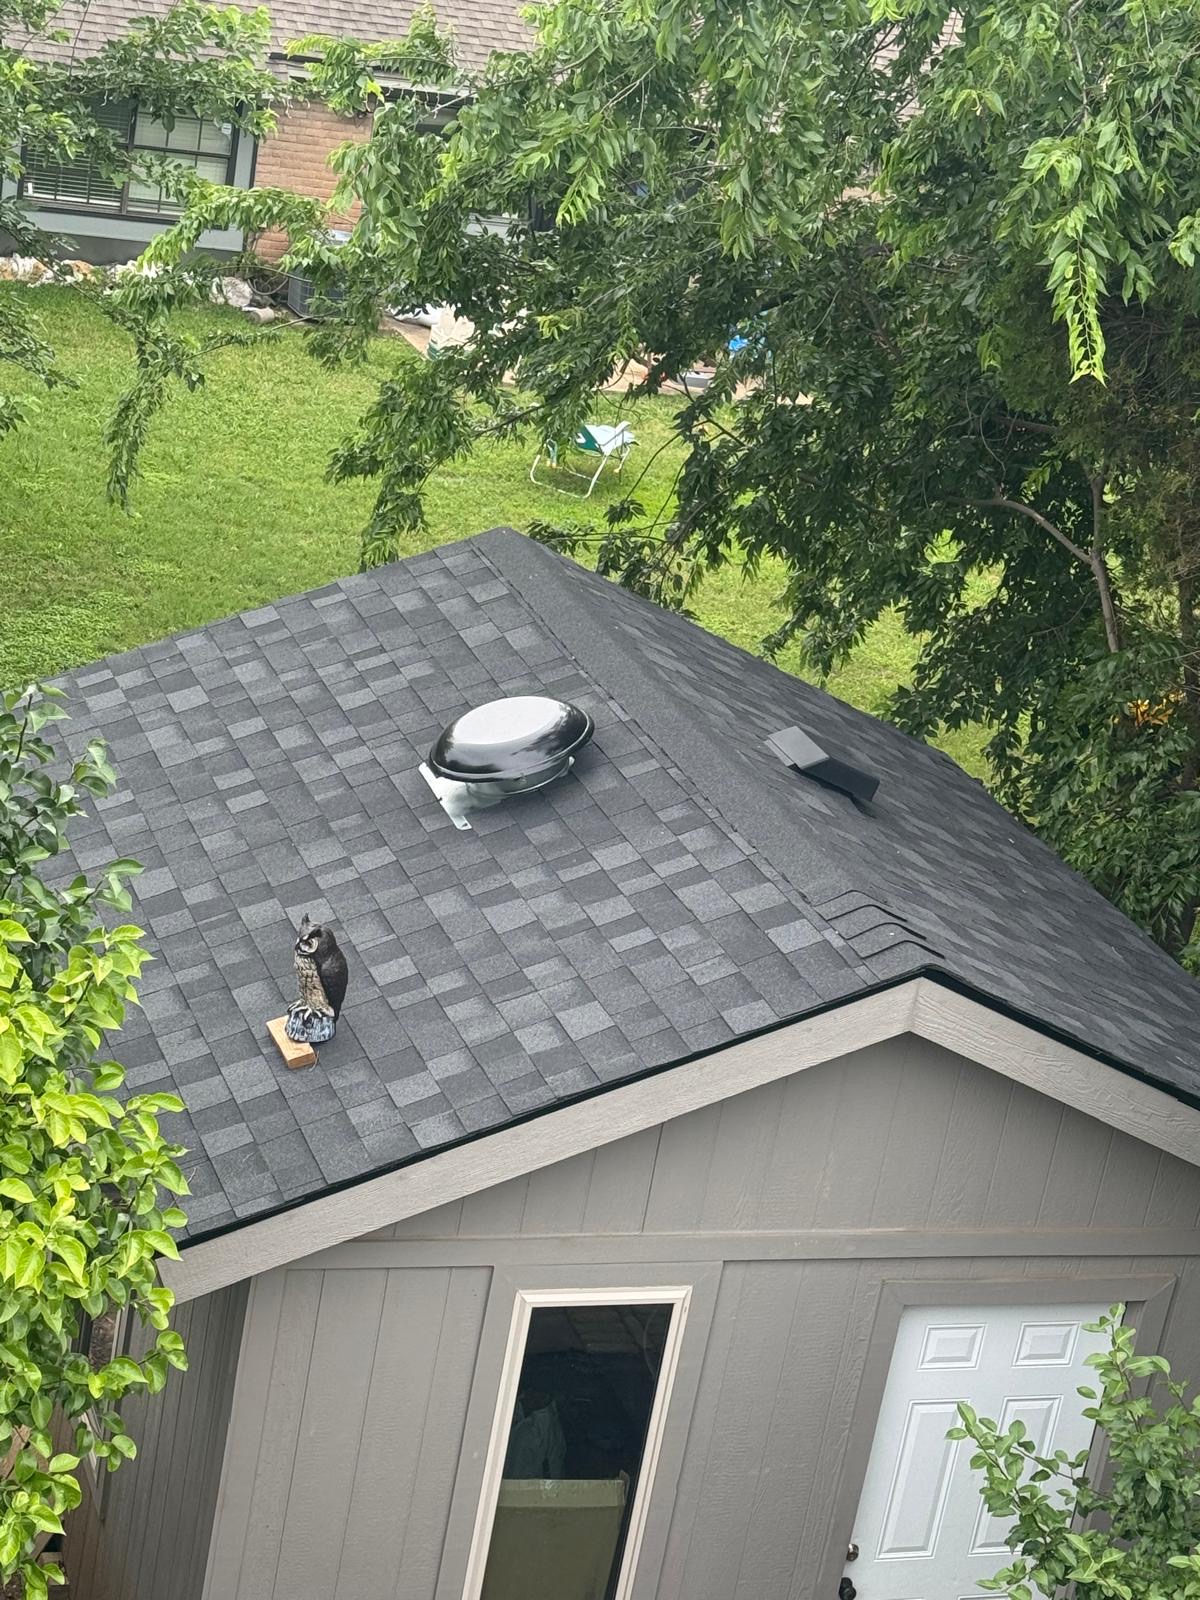
Document Other Roof Components
Don't forget flashing around chimneys, vents, skylights, and gutters. These areas are also susceptible to storm damage.
Record a Narrative Video
Walk through your findings, explaining what you see. This adds context and personal observation to your visual evidence.
Step 3: Documenting the "Little Things" – Dents, Granule Loss, and Other Subtle Signs
Hail damage isn't always a gaping hole or a missing shingle. Often, the most insidious damage is subtle and can be easily overlooked by the untrained eye. This is where your meticulous documentation pays off. Granule loss, as I mentioned earlier, is a big one. When hail strikes shingles, it can knock off those protective granules, exposing the asphalt mat underneath. This exposure accelerates the aging process of your shingles, making them more vulnerable to future damage and reducing their lifespan. Look for accumulations of these granules in your gutters, downspouts, or even in piles on the ground directly below your roofline. Take clear photos of these granule piles. Another key indicator is the presence of dents. On asphalt shingles, hail impacts can create small, circular depressions or bruises. These might not immediately cause a leak, but they weaken the shingle. You might see a circular pattern of discoloration or a slight indentation. Metal components, like flashing around chimneys, vents, or skylights, will often show clear, circular dents from hail impacts. These dents can compromise the seal and lead to leaks. Even gutters can get dented. When you're documenting, try to get photos that show the texture of the shingle and the presence of these subtle dents. Sometimes, a slight change in the shingle's appearance, even if it's not a crack, is enough to indicate damage that will require repair or replacement. Remember, insurance adjusters are looking for evidence that the storm caused damage, and these subtle signs, when documented comprehensively, can be just as important as a missing shingle.
Key Insight
Many homeowners focus only on the obvious damage, like missing shingles. However, insurance companies also recognize the cumulative effect of hail damage. Documenting subtle signs like granule loss and shingle bruising is crucial for demonstrating that the storm compromised the overall integrity and lifespan of your roof, not just a few isolated spots.
Obvious Damage
Large holes or sections of the roof exposed.
Subtle Damage
Visible granules in gutters or on the ground.
Subtle Damage
Circular indentations or discoloration on shingles.
Obvious Damage
Visible dents on metal components.
Step 4: Attic & Interior Checks – Finding Hidden Water Intrusion
The damage from a severe DFW storm doesn't always stay on the outside. Water can find its way through tiny openings and travel down into your attic and eventually into your living spaces. This is why a thorough interior inspection is just as vital as documenting exterior damage. Before you head into the attic, make sure it's safe to do so. Ensure there's adequate lighting and that you're not stepping on any weak spots in the ceiling joists. Look for any signs of water intrusion. This can manifest as dark stains, water marks, or even active dripping from the ceiling, rafters, or attic floor. Pay close attention to areas around vents, chimneys, and light fixtures, as these are common entry points for water. Even if you don't see active dripping, look for damp insulation or wet wood. If you find any signs of water, take clear photos or videos of the affected areas. Document the location within the attic or room. Also, check the walls of your home, especially near windows and doors, for any signs of water stains or peeling paint, which can indicate water seeping in from the exterior. The presence of moisture in your attic can lead to mold growth and structural damage, so it’s essential to identify and address it promptly. This interior evidence is critical for your insurance claim, as it directly demonstrates the impact of the storm on the integrity of your home.
If you have access to your attic, consider bringing a bright flashlight. Shine it upwards through the roof deck (if there are any small gaps) or simply sweep the light across the rafters and insulation. This can help reveal water stains or damp spots that might otherwise be missed in dim lighting.
How to Get This Done
DIY Inspection: Safely inspect your attic for water stains or damp insulation. Check interior ceilings and walls for any new water marks. Document everything with photos and notes. Expert Assessment: If you're unsure about safely inspecting your attic or want a professional opinion, our team at Montesco Roofing can conduct a thorough interior and exterior inspection. We know exactly where to look for hidden damage that could impact your claim. Schedule your free inspection today and let us help you identify all potential storm-related issues.
Step 5: Creating Your Damage Log – The Master Document for Your Claim
Once you've gathered all your photos, videos, and notes from your exterior and interior inspections, it's time to consolidate this information into a single, organized document: your damage log. This log will serve as the backbone of your insurance claim. It should be a clear, chronological record of everything you've observed and documented. Start by noting the date and time of the storm, followed by the date and time you conducted your inspections. For each piece of damage you documented, create an entry. Include: the location of the damage (e.g., "north side of roof, near chimney," "master bedroom ceiling"), a description of the damage (e.g., "three shingles missing," "circular dent on metal flashing," "water stain on drywall"), and reference your photos or videos (e.g., "See Photo #12," "Video clip 00:35"). If you found granules, note where they were found and how much. If you saw interior water stains, describe their size and location. Be as detailed and specific as possible. This log isn't just for your benefit; it's a professional presentation of evidence for your insurance adjuster. It shows you've taken the situation seriously and have done your homework. A well-organized log makes it easier for the adjuster to understand the extent of the damage and can significantly speed up the claims process. Think of it as your personal report that complements the adjuster's findings. In DFW, where hail storms can be widespread, having a detailed log can be the difference between a claim that accurately reflects the damage and one that falls short.

Key Takeaways
- A damage log is a chronological record of all observed and documented storm-related issues.
- Include the date/time of the storm and your inspections.
- For each damage point, note location, description, and reference your photo/video evidence.
- Be specific and detailed to clearly present the scope of damage to your insurer.
- A well-organized log streamlines the insurance claims process.
Step 6: Understanding Your Insurance Policy’s Requirements for Documentation
This is a crucial step that many homeowners overlook. Your homeowner's insurance policy is a contract, and it has specific terms and conditions, including requirements for reporting damage and providing documentation. Before you even start documenting, or at least very early in the process, it's wise to review your policy. Pay close attention to the sections related to storm damage, deductibles, and the claims reporting process. Some policies might require you to report damage within a certain timeframe after the event. Others might specify the types of evidence they expect. While most policies won't dictate exactly how you should take photos, they will likely require proof that the damage was caused by a covered peril (like hail or wind) and that it impacts your structure. Understanding your deductible is also key. Your deductible is the amount you pay out-of-pocket before your insurance coverage kicks in. Knowing this amount helps you assess whether the potential repair costs will exceed your deductible, which is often a threshold for filing a claim. If the damage is minor and below your deductible, it might not be worth filing a claim, as it could affect your premiums. Keep in mind that in Texas, there are specific regulations regarding hail damage claims and insurance companies. For instance, many policies have a separate "wind/hail" deductible, which might be a percentage of your home's value rather than a flat dollar amount. Familiarizing yourself with these specifics can prevent surprises down the line. If your policy is unclear, don't hesitate to call your insurance agent or the claims department to ask clarifying questions about their documentation requirements.
Do not assume your insurance company will automatically find all the damage. They rely on their adjusters, who are often on tight schedules. Your thorough documentation is your best tool to ensure they see the full picture and don't miss critical issues that could lead to an underpaid claim.
Step 7: When to Call Montesco Roofing: Expert Assessment & Claim Support
After you've done your initial documentation, the next critical step is to involve a qualified, local roofing contractor. This is where Montesco Roofing comes in. While your DIY documentation is valuable, it's essential to have a professional eye assess the damage. We've been protecting homes across the DFW Metroplex for over 13 years, and we understand the nuances of hail and wind damage specific to our climate. Our team is trained to spot damage that even the most observant homeowner might miss. We use specialized tools and techniques to conduct a comprehensive roof inspection, looking for subtle signs of damage, compromised underlayment, and potential issues with ventilation or flashing that could lead to future problems. More importantly, we understand the insurance claims process from the contractor's side. We know what insurance adjusters look for, and we can meet with them on-site to ensure they see all the damage. We can provide detailed repair or replacement estimates that align with industry standards and are often necessary for your insurance company to approve the claim fully. We've helped hundreds of homeowners in Plano, Frisco, McKinney, Fort Worth, and surrounding areas navigate their insurance claims successfully. Filing an insurance claim can be daunting, but having an experienced, local roofing contractor by your side makes a significant difference. We're not just here to fix your roof; we're here to advocate for you and ensure your home is restored to its pre-storm condition without you bearing unnecessary costs.
How to Get This Done
If you want to handle this yourself, here's exactly what you need: [tools/steps]. If you'd rather have experienced roofers handle it, our team has done this on hundreds of DFW homes — here's how our process works: After you call, we'll schedule a free, no-obligation inspection. We'll meet with your insurance adjuster if needed, provide a detailed estimate, and handle the installation with top-quality materials and craftsmanship. We'll also assist with navigating the paperwork to ensure your claim is processed efficiently.
| Feature | DIY Initial Assessment | Storm Chaser Assessment | Montesco Roofing (DFW Experts) |
|---|---|---|---|
| Expertise Level | Basic homeowner observation | Often high-pressure sales, may lack local knowledge | 13+ years DFW storm damage expertise, certified inspectors |
| Thoroughness | Limited to visible damage from ground/safe areas | May focus on immediate sales, not comprehensive assessment | Detailed inspection of all roof layers, interior, and exterior |
| Insurance Claim Support | Provides raw evidence; interpretation needed | May offer assistance, but often disappear after payment | Full support, meeting adjusters, providing detailed estimates, advocating for you |
| Local Accountability | N/A (you are the homeowner) | Often transient, difficult to find post-storm | 13+ years serving DFW; here for the long haul |
| Material Knowledge | General | Variable; focus on speed, not necessarily quality | Expertise in GAF, Owens Corning, CertainTeed, Atlas, and other premium materials |
| Warranty & Guarantee | N/A | Often limited or non-existent | Strong workmanship warranty on all installations |
| Long-Term Value | Essential first step for claim | Can lead to rushed, subpar work and future issues | Ensures proper repair/replacement, protecting your investment for years |
Need help putting this into action? Our team has protected hundreds of DFW homes. Tell us about your roof — free inspection, no pressure.
Get Your Free Roof Inspection →Frequently Asked Questions About Documenting Roof Damage for Insurance Claims
How soon after a storm should I document my roof damage?
What if I can't get clear photos of the damage from the ground?
Should I call my insurance company before or after getting a roofer's assessment?
How do I know if hail damage is severe enough to file an insurance claim?
What is a "storm chaser" and why should I be wary?
Can I document damage on my neighbor's roof if it looks similar?
Montesco Roofing Team
DFW's trusted roofing contractor with 13+ years of experience. Specializing in roof replacements, storm damage repair, and insurance claims across Dallas-Fort Worth.
Get in touch →